Hazards Overview
In the OH&S node, navigate to Hazards sub-node and then to the required location (as described in Navigation). This will display a pane on the right with all the information associated with the selected location. Note that the structure here is the same as the OH&S Locations structure, and this can be expanded in the same way as OH&S | Locations.
The Hazards window allows you to view existing hazards, or add a new hazard for a location. This window uses tables from the Australian Standard and New Zealand Standard ISO 31001:2009 Risk Management – Principles & Guidelines (see Incidents Details - AS1885).
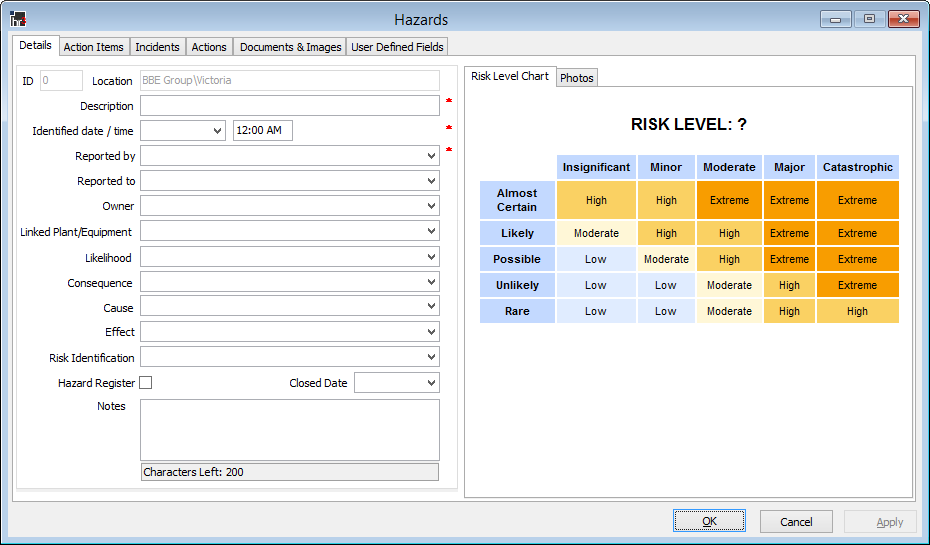
Hazards Window
If an OHS hazard has been identified at a location you will need to add the details of the hazard to the relevant location.
- Highlight the location in the tree structure
- Click Add New to open the Hazards window:

Risk Level Chart
On this tab the Risk Level chart will adjust automatically depending on the details you select from the Likelihood and Consequence tables. It provides a conclusion to the risk level of the hazard, for example from ‘Low’ to ‘Extreme’. The standard risk levels are taken from ISO 31000:2009, however you may also customise the terminology and specified risk levels within this table. To amend the terminology used on the table, go to OH&S | OH&S Framework | Validation Tables | Hazards, then for each of the relevant tables (Likelihood, Consequences, Risk Level) specify your preferred terminology within the Override Descriptor fields. It is these descriptions that will appear on the Risk Level chart.
Note that you can also view any photos that you have submitted for this hazard, using the Photos tab above the Risk Level Chart. (See Document Window for information on adding photos.)
See Hazards Window - Tabs for a description of this window.
Back to Introduction to OHS
